简单记录在Ubuntu Linux上搭建本地伪分布式的Hadoop MapReduce集群过程及使用方法。
安装并配置hadoop
安装Hadoop及需要的工具
- jdk 1.7或以上版本:http://www.oracle.com/technetwork/java/javase/downloads/index.html,并配置JAVA_HOME环境变量。
- hadoop稳定版本,下文以2.6.4为例:http://hadoop.apache.org/releases.html,下载编译好的binary压缩包,解压到某目录,如
/home/forec/hadoop-2.6.4,并设置HADOOP_HOME,如在/etc/environment中添加export HADOOP_HOME=/home/forec/hadoop-2.6.4/。 sudo apt-get install sshsudo apt-get install rsync
设置环境变量
- 在
%HADOOP_HOME%/etc/hadoop目录下的hadoop-env.sh中添加export JAVA_HOME=/path/to/jdk。 - 在
/etc/environment中添加export HADOOP_PREFIX=/home/forec/hadoop-2/6/4/。 - 下面的操作均在HADOOP_HOME目录下进行。
本地非分布式操作
在默认模式下,hadoop被配置为非分布式的运行模式,以单独的java进程运行,适合debug。以下命令演示以非分布式方式在hadoop上运行。
- 执行下面命令启动本地hadoop作业
1 | mkdir /dir_for_input |
本地伪分布式操作
hadoop可被配置为一个单个节点的伪分布式系统,每一个虚拟操作以单独的java进程运行。
修改配置文件
- 修改
etc/hadoop/core-site.xml如下。
1 | <configuration> |
- 修改
etc/hadoop/hdfs-site.xml如下。
1 | <configuration> |
- 配置无密钥ssh登录localhost:尝试
ssh localhost,若需输入密码,则通过下面命令免除输入密码的操作。其中如果本地已经生成了ssh密钥可以省略。
1 | ssh-keygen -t dsa -P '' -f ~/.ssh/id_dsa |
在本地启动hadoop
- 格式化文件系统:
$ bin/hdfs namenode -format。 - 启动NameNode和DataNode:
sbin/start-dfs.sh,其log文件写入%HADOOP_HOME%/logs。 - 访问地址
http://localhost:50070可以看到NameNode的网页接口,如下图。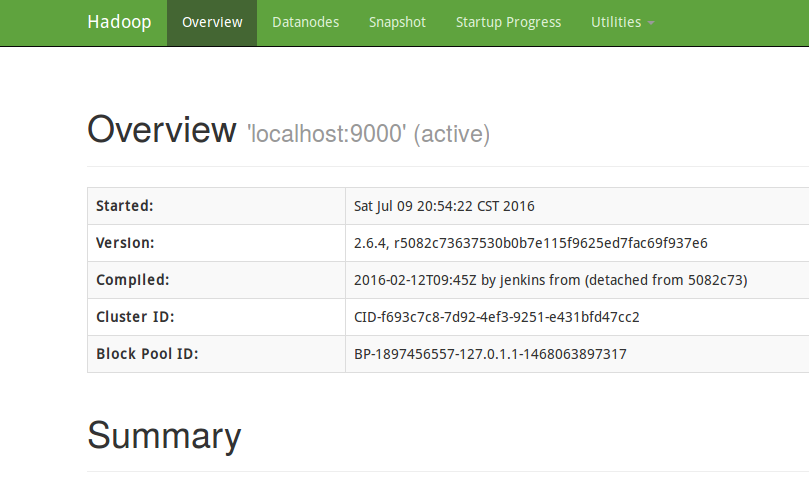
- 将地址栏的
http://localhost:50070/dfshealth.***改成http://localhost:50070/dfshealth.jsp可进入文件系统,如下图。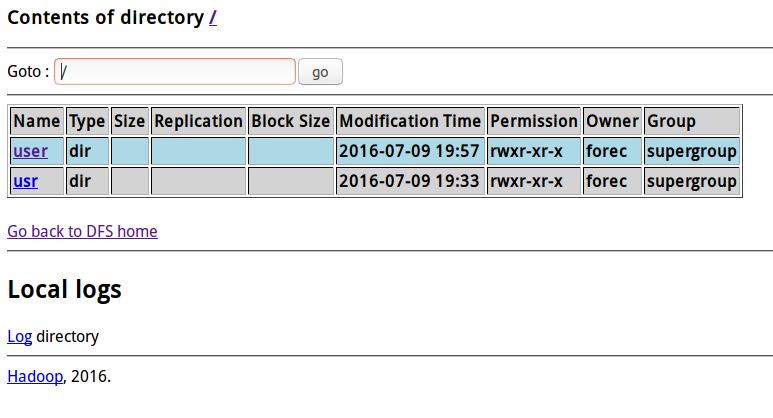
- 建立HDFS目录以执行MapReduce任务:
$ bin/hdfs dfs -mkdir /user,$ bin/hdfs dfs -mkdir /user/<username>。 - 将输入文件拷贝到分布式文件系统中:
$ bin/hdfs dfs -put /local_dir_for_input_files /dir_in_distributed_filesystem_for_input。 - 注意上面的
/dir_in_distributed_filesystem_for_input是分布式文件系统中输入文件的目录,此命令将本地的输入文件拷贝到了分布式文件系统的该目录中。 - 运行jar包:
$ bin/hadoop jar jar_file_to_excute /dir_in_distributed_filesystem_for_input /dir_in_distributed_filesystem_for_output。 - 检查输出文件可以通过将分布式文件系统中的输出文件拷贝到本地,或直接在分布式文件系统中查看。拷贝到本地执行如下命令:
$ bin/hdfs dfs -get /dir_in_distributed_filesystem_for_output /local_dir,$ cat /local_dir/*;在分布式文件系统查看执行如下命令:$ bin/hdfs dfs -cat /dir_in_distributed_filesystem_for_output/*。 - 任务完成后终止hadoop虚拟机:
$ sbin/stop-dfs.sh。
在YARN执行MapReduce作业
需要完成前面“在本地启动hadoop”的配置中1~4步。
- 修改
etc/hadoop/mapred-site.xml,此文件在2.6.4版本中不存在,可以修改etc/hadoop/mapred-site.xml.template并新建该文件。
1 | <configuration> |
- 修改
etc/hadoop/yarn-site.xml。
1 | <configuration> |
- 启动资源管理器和节点管理器:
$ sbin/start-yarn.sh。 - 启动浏览器,访问
http://localhost:8088/,可以查看hadoop的资源监视器,如下图。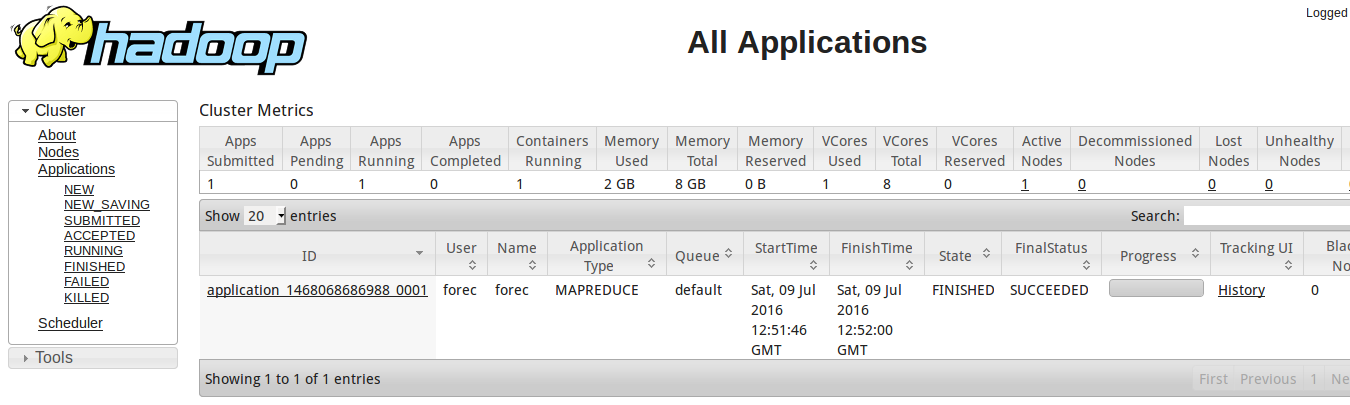
- 按上面执行hadoop的方式执行一个MapReduce任务。
- 作业完成后关闭虚拟机:
$ sbin/stop-yarn.sh。
需要注意,在伪分布式的hadoop上执行MapReduce任务时,需ssh到localhost,之后在8088端口才能看到作业记录。
Spark 测试
Spark 自带的 Pi 测试:
1
2
3
4
5
6
7
8# spark local
/opt/spark-1.6.3/bin/spark-submit --class org.apache.spark.examples.SparkPi /opt/spark-1.6.3/lib/spark-examples-1.6.3-hadoop2.6.0.jar 10
# spark yarn client
/opt/spark-1.6.3/bin/spark-submit --class org.apache.spark.examples.SparkPi --master yarn /opt/spark-1.6.3/lib/spark-examples-1.6.3-hadoop2.6.0.jar 10
# spark yarn cluster
/opt/spark-1.6.3/bin/spark-submit --class org.apache.spark.examples.SparkPi --master yarn --deploy-mode cluster /opt/spark-1.6.3/lib/spark-examples-1.6.3-hadoop2.6.0.jar 10出现 slave lost 的问题,可能是 这里 导致的问题,在
etc/hadoop/yarn-site.xml中加入:1
2
3
4
5
6
7
8
9<property>
<name>yarn.nodemanager.pmem-check-enabled</name>
<value>false</value>
</property>
<property>
<name>yarn.nodemanager.vmem-check-enabled</name>
<value>false</value>
</property>
完整的hadoop作业运行示例
- 安装并配置好hadoop,执行
$ sbin/start-yarn.sh和$ sbin/start-dfs.sh。 - 一段简单的java代码如下,export出的jar包可在hadoop上执行MapReduce作业。使用eclipse或idea时,需要导入SDK、JDK和scala-hadoop-assembly包。
1 | package test; |
- 生成的jar包即可通过上述执行方式运行在hadoop上。
参考文献: Hadoop官方文档
原创作品,允许转载,转载时无需告知,但请务必以超链接形式标明文章原始出处(https://forec.github.io/2016/07/09/hadoop-build/) 、作者信息(Forec)和本声明。